Quickstart
Download the Lexe Wallet app
To get started, you'll need a Lexe wallet. Developers building on the Sidecar SDK are eligible for early access to Lexe wallet, which is currently in closed beta. Fill out this short form, which will give you a signup code:
Download the mobile app for:
- iOS (Testflight): https://lexe.app/beta-ios
- Android (Play Store): https://lexe.app/beta-android
iOS users: Testflight sometimes asks for an "access code", which is different from our signup code; you may need to reinstall the Testflight app to get past this.
After installing the app, select "Create a new wallet", enter the signup code sent to your email, connect your Google Drive (for backups), and set a backup password. This will create a new self-custody Bitcoin+Lightning wallet that runs in a secure enclave in the cloud; you can now send and receive Lightning payments 24/7!
Export client credentials for the SDK
To control your wallet using the Lexe Sidecar SDK, you'll first need to export client credentials from the app:
- Open the Lexe app > Menu sidebar > "SDK clients" > "Create new client"
- Copy the client credentials string
The sidecar supports two ways to provide credentials:
Option 1: Default credentials via env (single-wallet use)
Set LEXE_CLIENT_CREDENTIALS in your environment or in a .env file:
# Option 1A: Set directly in environment
$ export LEXE_CLIENT_CREDENTIALS="eyJsZXhlX2F1dGhfdG9rZ...TA0In0"

# Option 1B: Use a .env file which the sidecar loads automatically
$ git clone https://github.com/lexe-app/lexe-sidecar-sdk.git
$ cd myproject
$ cp ../lexe-sidecar-sdk/.env.example ./.env
$ chmod 600 .env
# Then edit .env and set LEXE_CLIENT_CREDENTIALS
Option 2: Per-request Authorization header (multi-wallet use)
Alternatively, you can pass credentials per-request via the Authorization
header, with the value formatted as Bearer <credentials>.
This is useful for multi-wallet scenarios where different requests control
different Lexe wallets.
$ curl http://localhost:5393/v2/node/node_info \
    -H "Authorization: Bearer eyJsZXhlX2F1dGhfdG9rZ...TA0In0"
If both default credentials (env) and per-request credentials (auth header) are provided, the per-request credentials take precedence.
Install the lexe-sidecar binary
The Lexe Sidecar SDK is distributed as a single self-contained binary called
lexe-sidecar.
It runs a local webserver that accepts HTTP requests
and manages the connection to your Lexe node.
Official install script
The easiest way to install lexe-sidecar is using the official install script:
This will install the lexe-sidecar binary at ~/.local/bin and add it to your
PATH.
To use the sidecar in your current shell, you may need to run:
Alternative installation methods
If you prefer manual installation or need to build from source:
- Download a precompiled binary from the Releases page
- Build the binary from Rust source: see BUILD.md for instructions
Using the lexe-sidecar as a Rust library
If you're working in Rust, you may also use the lexe-sidecar as a Rust
library, which provides:
- A
Sidecarwebserver which can be.run()within your async Rust app. - A
SidecarClientwhich fully implements the sidecar API.
See example-rust for an example which implements both a sidecar client and server.
Run the sidecar
Run the sidecar from your project directory which contains the .env file:
Or if you downloaded the binary manually:
Make your first request to the sidecar:
$ curl http://localhost:5393/v2/node/node_info | jq .
{
  "version": "0.7.9",
  "measurement": "6d6ae19f2a82167abecd7bbe834e417a1b3c9c8971d08bd05b24533de21bf3f1",
  "user_pk": "63ad1661bfc23ad25f5bcc6f610f8fd70d7426de51be74766c24e47f4b4fcfca",
  "node_pk": "02e4d8f86591eb2ce59a787e2a5abb83278c86198ac22854e9e3cf365cf8d9730f",
  "balance": "95507",
  "lightning_balance": "40000",
  "usable_lightning_balance": "40000",
  "max_sendable_lightning_balance": "39824.777",
  "onchain_balance": "55507",
  "trusted_onchain_balance": "55507",
  "num_channels": 1,
  "num_usable_channels": 1
}
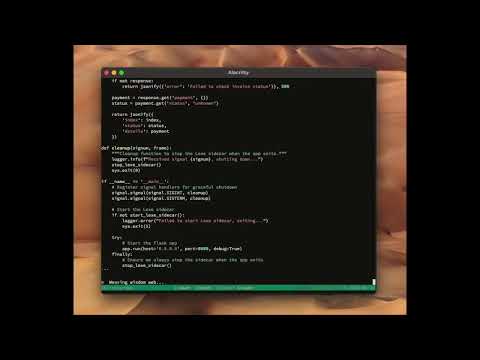
You're all set - it's time to build your Lightning app! Here's a prompt which
allowed us to "vibe code" a fully functional Lightning tip page in less than 4
minutes with Claude Sonnet 3.7 and goose -
Cursor, Windsurf, etc work well too. Since this prompt tells the AI to run the
sidecar as a subprocess of your app, you should stop the running sidecar first.
Also be sure to change the project names and paths to match your own machine.
Build a tip page powered by the Lexe API. This will be a python web service that
renders a simple tip page for visitors to our site. When a visitor taps the tip
button, the backend will query the Lexe API for a new Lightning invoice and
render it as a QR code on the frontend. The frontend will repeatedly poll the
backend for the invoice status until it's paid. Once the invoice is paid,
it will go the success page and show a confetti animation.

The backend should spawn the Lexe sidecar as a subprocess. The sidecar will
expose the Lexe API at `http://localhost:5393`. You can find the sidecar binary
at </Users/satoshi/.local/bin/lexe-sidecar>. You can find the Lexe API docs
at: </Users/satoshi/dev/lexe-sidecar-sdk/README.md>. Make sure you read this
first so you understand how all the pieces fit together.

We're running on macOS and already have python 3.12 installed. You're already
in the project directory </Users/satoshi/dev/myproject>. Try to use the python
standard library as much as possible. Create a new python virtual environment to
keep all the dependencies isolated. The frontend can be a simple HTML page
rendered by the backend with some basic JS+CSS for polling and rendering the QR
code. Serve the backend on port 8080.

Don't ask for permission, just start coding.
Replit Users
If you're building on Replit, you can quickly set up the sidecar in your environment by pasting the setup prompt below.
Recommended: Prompted Setup with Replit Agent
Before starting the Replit Agent, make sure the Agent is set to "Build" (not "Plan") and the application type is NOT set to "Automation":
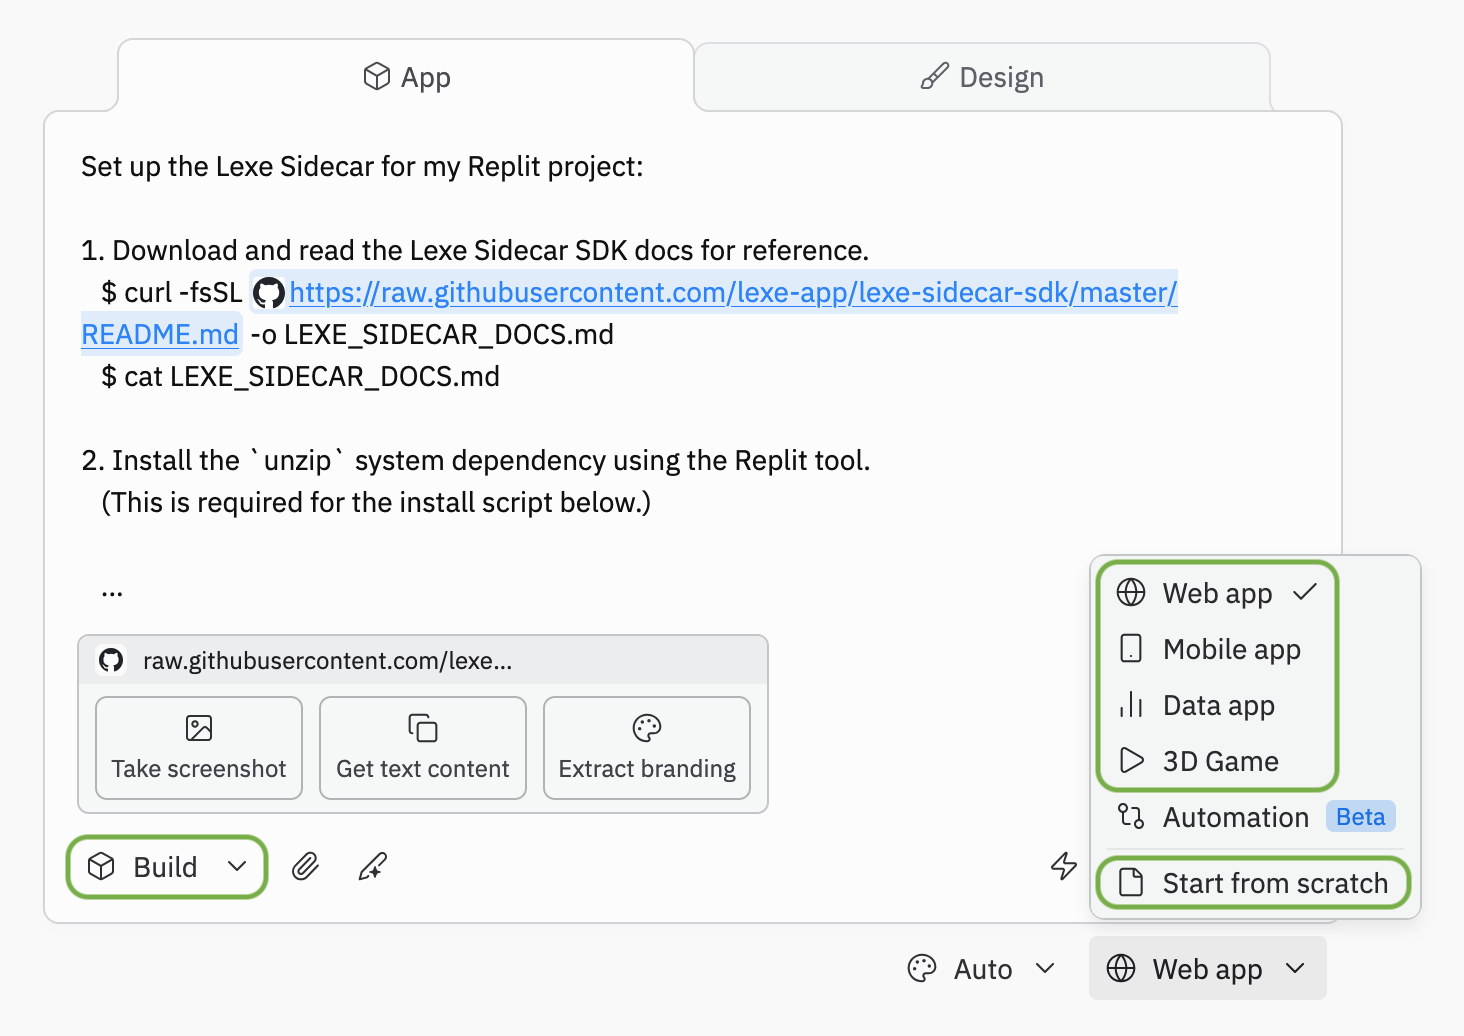
Then paste this prompt into the Replit Agent:
Set up the Lexe Sidecar for my Replit project:

1. Download and read the Lexe Sidecar SDK docs for reference.
   $ curl -fsSL https://raw.githubusercontent.com/lexe-app/lexe-sidecar-sdk/master/README.md -o LEXE_SIDECAR_DOCS.md
   $ cat LEXE_SIDECAR_DOCS.md

2. Install the `unzip` system dependency using the Replit tool.
   (This is required for the install script below.)

3. Install the `lexe-sidecar` binary.
   $ curl -fsSL https://raw.githubusercontent.com/lexe-app/lexe-sidecar-sdk/master/install.sh | sh

4. Prompt me for my `LEXE_CLIENT_CREDENTIALS` value and configure it as a Replit secret.

5. Ask me to update the `.replit` file to run the sidecar, then confirm it has been configured correctly before proceeding.
   When showing me what to change, provide the exact old and new TOML blocks so I can copy-paste without needing to understand TOML syntax.
   Make these TWO changes:

   A. Add a new "Lexe Sidecar" workflow that runs in parallel with the app.
      Add this workflow definition (do NOT add waitForPort - it causes timeouts):
      ```
      [[workflows.workflow]]
      name = "Lexe Sidecar"
      author = "agent"
      mode = "sequential"

      [[workflows.workflow.tasks]]
      task = "shell.exec"
      args = "./.local/bin/lexe-sidecar"
      ```

      Then add a task to run this workflow in parallel with the main app workflow:
      ```
      [[workflows.workflow.tasks]]
      task = "workflow.run"
      args = "Lexe Sidecar"
      ```

   B. Update the `[deployment]` section's `run` array to prepend the sidecar.
      Wrap the command in a shell invocation.
      For example, change:
      `run = ["npm", "run", "server:prod"]`
      to:
      `run = ["sh", "-c", "./.local/bin/lexe-sidecar & npm run server:prod"]`

6. Restart the workflow using the `restart_workflow` tool, then wait a few seconds for it to restart.

7. Confirm sidecar is up and running.
   - Check the health endpoint: curl http://localhost:5393/v2/health
   - Test the credentials config: curl http://localhost:5393/v2/node/node_info

The sidecar will now run automatically alongside the application at http://localhost:5393.

Once we've confirmed that the sidecar runs smoothly with client credentials configured correctly, return to me and we'll begin working on our app. Don't stop until we've confirmed that the node-info endpoint works correctly.
The Replit Agent will configure everything, prompt you for your credentials, and verify the setup is working.
Manual Setup
If you prefer to configure manually:
- Install
lexe-sidecar:curl -fsSL https://raw.githubusercontent.com/lexe-app/lexe-sidecar-sdk/master/install.sh | sh - Configure your
LEXE_CLIENT_CREDENTIALSas a Replit secret - Update
.replitto add a "Lexe Sidecar" workflow that runs./.local/bin/lexe-sidecarin parallel with your app - Update the
[deployment]section'srunto prepend./.local/bin/lexe-sidecar & - Restart the workflow
The sidecar will now run automatically alongside your application at
http://localhost:5393.
Unofficial lexe-wrapper Python package
Note: This is an unofficial, community-made tool not developed by Lexe. Use at your own risk.
Python users may be interested in using the
lexe-wrapper
Python package developed by @matbalez which
simplifies binary management, the subprocess lifecycle, and connection setup -
simply pip install lexe-wrapper to get started.
See the lexe-wrapper repo for
further instructions.
Demo
Watch us vibe code a fully functional Lightning tip page using the above prompt in less than 3 minutes: